Save your money, save your waist-line…
It’s the first week of October, so of course the stores are well-stocked with trick-or-treat candy, but does that mean you need to stock your pantry?!? Probably not…be realistic, if you buy Halloween candy now will it actually be around on October 31st when the kids come knocking? I doubt it! Instead you or your spouse and/or your kids will have eaten it all up and you will have to go buy more for the trick-or-treaters.
My advice, leave the candy in the store until just a few days before Halloween otherwise, stepping on the scale might get a little scary!
Yours in Health & Fitness,
Karin Jennings
XO Fitness
karin@xofitness.com
05-Oct-2012
Comments Off on Wait! Don’t buy that Halloween Candy yet!
28-Sep-2012
Comments Off on XO Friday Foodie: Super Simple Salmon Patties (Low Carb, Gluten Free)
Sometimes it’s nice to simplify something already simple. Too many ingredients and preparation equals a big mess. With many of our clients trying out our Smart Loss Seminars and learning how to cycle their carbohydrates to break weight loss plateaus, we decided that it was time to simplify our already simple Salmon Patties.
Low Carb Salmon Pattie1 pouch (5oz) of Salmon (See the original recipe if you want to use a larger, less expensive can of salmon)1eggs
1/2 teaspoon Italian seasoning
1/8 teaspoon garlic powder
1/4 teaspoon onion powder
1 pinch of black pepper
07-Sep-2012
Comments Off on Friday Foodie: Blackened Fish Tacos
25-Aug-2012
Comments Off on Friday Foodie: Eggplant Palooza
Friday Foodie: Eggplant Palooza
Category : Healthy Eating
Our neighbor had a few extra eggplants that they had grown and I happily took them. I thought I’d make one of my favorite
eggplant recipes, baba ghanouj (pronounced ga-new), but one of my clients always talks about how good his eggplant Parmesan is, so I made that instead. The eggplant is baked instead of fried, but it is still breaded which admittedly reduces its diet-worthiness. (My recipe for grill-cooked baba ghanouj is at the bottom of this post).
Eggplant Parmesan (Adapted from a Meatless Monday recipe)-1 large eggplant or up to 3 smallish ones (which is what I had)– 1 cup flour-2 eggs-1/2 cup milk-2 cups italian bread crumbs (or more)-2 cups of your favorite marinara type spaghetti or pizza sauce-1/2 cup parmesan cheese-1/2 cup mozzarella cheese (optional, omit for lower fat/calorie version)My client Jim E. says the secret to his Eggplant Parmesan is to remove as much water from the eggplant as possible ahead of time. He does this by slicing the eggplant into 1/4 inch thick discs, lightly salting them and placing them in a single layer between two kitchen towels for at least 30 minutes.
Preheat your oven to 400′ and cooking spray two cookie sheets (or ‘grease’ with olive oil).
Next, put the flour in a bowl and dredge each slice of eggplant until they are coated and set eggplant aside. Add the Italian bread
crumbs to remaining flour (or dump out the flour, your choice). Scramble the two eggs and milk together in a bowl. Dunk a slice of eggplant into the milk and egg mixture and then dredge to coat in the bread crumbs. Arrange breaded eggplant onto your prepared cookie sheets. Repeat until all the eggplant is coated, or your hands
get so disgusting that you decide to throw it all out and go out for dinner (only to remember you left the oven on ;-).
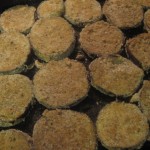
Put the eggplant in the oven for 10 minutes. Pull it out, flip the eggplant slices and bake again for 10 minutes. Remove the eggplant from the oven and TURN THE OVEN DOWN to 350′.
Next, put the browned eggplant into a greased 9×13 pan, layer in an overlapped fashion as needed to fit it all in. Pour the two cups of marinara sauce on top and then sprinkle on the Parmesan cheese. Cover with aluminum foil and bake for 15 minutes.
Remove your eggplant from the oven and remove the aluminum foil. (You can add the mozzarella now if desired). Put it back in the oven and bake uncovered about 10 – 15 minutes until the cheese looks bubbly or slightly browned. We recommend serving with extra marinara sauce and a gorgeous salad.
Baba Ghanouj (A delicious eggplant dip)-1 large eggplant-2 cloves of garlic-2 Tablespoon lemon juice or juice of 1/2 a fresh lemon-1/2 teaspoon salt (or to taste)-1/2 teaspoon ground cumin or coriander(optional)-2 Tablespoons Tahini (optional, none for low fat, or up to 4T to taste)-1 Tablespoon Olive oil (also optional for low fat version)Roast the eggplant until mushy soft. You can do this several ways and here is a link to a great photo series. Method one: On the grill, prick the eggplant and wrap in aluminum foil and bake on low heat, rotating 1/4 turn every 8-10 minutes until very soft. Method two: prick and wrap in aluminum foil as before but bake at 350′ in oven for 45-60 minutes until very soft (use a pan or cookie sheet to catch drips). Method three: Slice eggplant in half and place face down in greased pan and put under broiler for 15-30 minutes until charred and very soft. Method four: Prick eggplant and place on a couple paper towels or in bowl and microwave on high until it deflates 8-15 minutes depending on size (This last method loses that tasty smokey flavor, but it is the quickest.)
When cool enough to handle, scoop out the soft insides and put into blender with any captured juices and all other ingredients. Blend until smooth and enjoy with fresh vegetables or on a sandwich. Try to avoid using every bread and cracker in the house to scoop it up or you’ll blow this otherwise healthy food! Enjoy, -XO
03-Aug-2012
Comments Off on Friday Foodie: Crunchy Chickpeas Snack
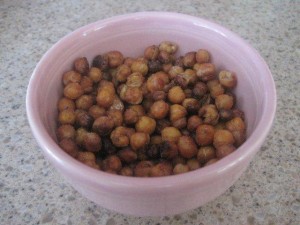
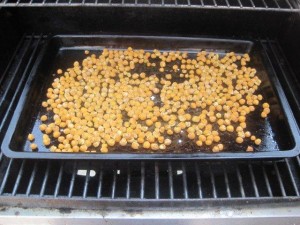
One of our clients suggested that we try this super simple savory snack. Low in fat and high in fiber these are a nicely satisfying snack that ranks high in the nutrition world.
Each 1/4 cup of crunchy goodness has 120 calories comprised of 2g fat, 6g protein, 20g carbs (including 6g of fiber: that’s a whopping 24% of the recommended daily allowance of fiber). Omit the salt and use chickpeas made from dry if you are concerned about your sodium intake.
Crunchy Chickpeas (makes 1 3/4 cups):- 2 cans (3 1/2 cups cooked) Chickpeas
- A whimsical mixture of your favorite spices (see suggestions)
- popcorn salt (for after cooking)
- 1/2 teaspoon of: cumin & 1/4 teaspoon of cayenne.
- 1/2 teaspoon of each coriander and paprika (or smoked paprika)
- 1 teaspoon curry, either hot or sweet
- 1 teaspoon garam masala
- 1/2 to 1 teaspoon of any premixed seasoning blend, ie: Nature’s seasoning, Pleasonings, Lawry’s etc…
- Note: Do not use spice mixtures containing sugar as it will burn.
*Now say “signature super simple savory subtly spicy snack” five times fast! Enjoy -XO
13-Jul-2012
Comments Off on Friday Friday Foodie: Avocado Salsa
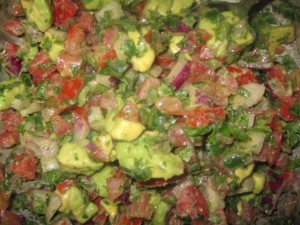
This week’s Friday Foodie is Nicole C. who suggested this most delicious salsa from one of my favorite food websites:
www.epicurious.com. If you haven’t checked epicurious out, you can type in a main ingredient and come up with a list of recipes that incorporate your searched ingredient along with excellent reviews and ratings. It is an un-abashedly flavor first, damn the calories website, so it is wise to be calorie wary when surfing their delicious recipes.
Simple and delicious, the original recipe adds more olive oil than we would without sacrificing flavor. That said, we’ve tweaked the recipe with 1/2 the olive oil (subtract roughly 200 calories) and we strongly suspect that 1/4 the olive oil (1T) would be un-noticeable. Here’s our take:
Avocado Salsa:
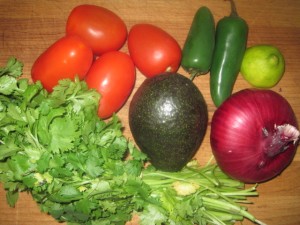
- 2 large tomatoes, seeded, diced
- 1/2 red onion, chopped
- 1/2 cup chopped fresh cilantro
- 2 tablespoons olive oil (try 1 tablespoon, it’s probably plenty and you can always add more)
- 2 tablespoons fresh lime juice
- 1 to 2 large jalapeño chilies, seeded but not deveined, minced
- 1 large avocado, diced
Mix well and serve! Enjoy with friends to savor the fresh wonder of this simple recipe. -XO
03-Jul-2012
Comments Off on Spot Reduction Doesn’t Work
Spot Reduction Doesn’t Work
Category : Active Living, Exercise
Last week we kicked off our “Moves You Can Use” blog with exercises for specific body parts. That led to the inevitable question, “Can you do a series on ‘How to make my belly flatter’?” That question made us realize that we ought to address the “spot reduction” myth head on!
How do I get rid of this?
People ask us all the time, “What’s the best exercise to get rid of this?” (as they point to an area of their body they feel is a bit too flabby) Infomercials are always promising to “burn fat” off of your belly, your butt, or your thighs. This drives us (and most likely all fitness professionals) crazy because doing specific body part exercises will definitely help to strengthen that muscle but you cannot “spot reduce” fat.
Burn, baby, burn
Yes, you definitely feel your abdominal muscles when you do crunches or your glutes when you do an exercise to target them. The “burn” you feel is because those muscles are exerting a lot of energy NOT because you are burning fat. So doing abdominal crunches does not mean you are burning abdominal fat. If your abdominal fat is resistant to mobilization then it will probably be the last fat to be mobilized and utilized. (I know, you didn’t want to hear that) You will likely notice changes to your arms and other areas and start to wonder why the fat around your stomach (or hips) isn’t cooperating. Be patient, eventually it will happen!
So why do spot specific exercises?
As a trainer instruct clients to do specific exercises for core, glutes, arms, etc. The reason is to strengthen those muscles. There are many muscles that become weak when humans spend too much time sedentary and to avoid injury a strong core and glutes are important.
What else can you do?
A combination of aerobic exercise, interval training and muscle-conditioning will get you mobilizing that unwanted body fat. Realize that adopting an active lifestyle with a minimum of 30 minutes of exercise each day and a healthy diet is also crucial to reducing your body fat. The trainers at XO can help you make the changes needed to reach your health & fitness goals. It’s important to pick just one thing that you can do differently this week and make it a habit!
29-Jun-2012
Comments Off on Friday Foodie: Grilled Swai & Cauliflower
It’s time to pull out the grill when it’s over 90’F outside with 100% humidity(and the air 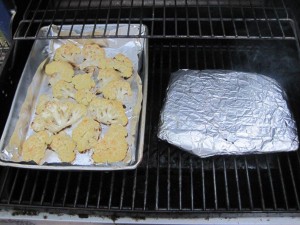 conditioner seems to be running non-stop just to keep the house below 80!).
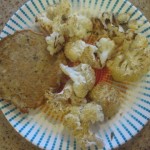
This week our Friday Foodie’s are Karin and her father Paul. Karin for her cauliflower recipe recently posted here, and Paul for his seasoning recipe that he found for Spicy Grilled Fish. His recipe calls for Red Snapper or Orange Roughy Fillets, but I found something in the Fish Freezer called Swai. So I bought it, brought it home, and then looked up online what the heck it was and how to cook it.
According to Wikipedia, Swai is actually an omnivorous freshwater fish found in Thailand’s  Mekong River. It is really an “Iridescent Shark Catfish” but apparently due to international concerns regarding shark products, it was renamed Swai. That said, Swai is a mild white fish that has a soft texture and could easily be blackened like Catfish. I used Paul’s seasoning blend sparingly (although I love it hot!
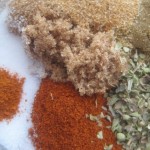
Paul’s Spicy Fish Seasoning Blend:
2t Paprika1t salt1t onion powder1t garlic powder1/4-1/2 t cayenne powder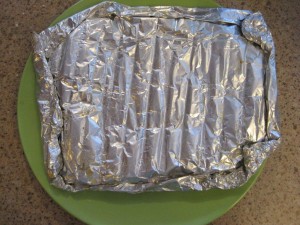 1/8-1/4 t white pepper1/4 t each of dried oregano, basil & thyme. Method: Defrost and pat excess water off of fish fillets. Rub the fillets with olive oil and then sprinkle both sides with the seasoning blend. (Go light for those who don’t like it hot!) Spray the Grill with cooking spray BEFORE lighting it. Grill fillets, covered, for 3-4 minutes per side or until fish flakes with a fork.
Now, that’s what I was told to do. What I actually did was make an aluminum foil packet and 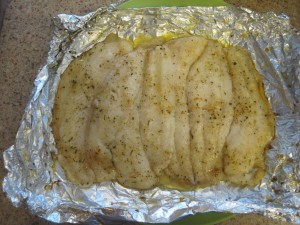 cooked it in that instead. Because the kids are highly spice sensitive, I actually used very little of the seasoning blend and dotted the fillets with butter. The result was almost too tender. I think I’ll blacken the Swai next time I grill it and place it directly on the grill. -Ryan.
26-Jun-2012
Comments Off on Build a Better Butt #1
Build a Better Butt #1
Category : Exercise
Quadruped Hip Extension: On your hands and knees, slightly contract your abdominals to stabilize your torso and spine. Keeping the knee bent at 90 degrees; lift leg up until the thigh is lined up with the body (parallel to the floor). Do not lift any higher because this will cause the spine to arch.
According to John Porcari, an exercise scientist at the University of Wisconsin-La Crosse, “When you look at the EMG levels, quadruped hip extension elicited the highest muscle activation, and we did it without any weight. I think if you used ankle weights, that exercise would be even more effective in terms of targeting the buttocks.”
How many should you do? Try 10 -15 SLOW & controlled lifts.
Why train your glutes? One look in a three-way mirror is enough to motivate most of us. However, besides looking good, training your gluteals is important because if they are weak you are at risk for low back and/or knee problems.
08-Jun-2012
Comments Off on XO Friday Foodie: Spinach & Rice Balls
Express option: Substitute 1/2 teaspoon of powdered onion and 1/4 teaspoon of garlic for fresh and skip sauteing and simply mix it all together. (AKA ‘The way we make it 90% of the time!’)
Spinach and Rice Balls (Photo credit: Meatless Monday)
Recipe:
- Preheat the oven to 350 degrees.
- Grease a Baking Sheet or use parchment paper
- Locate or create 3 cups of cooked long grain brown rice.
- Defrost 10oz pkg chopped spinach & Squeeze out water.
- Finely chop 1 small onion
- Mince 2-3 cloves garlic
- Saute onion and garlic in olive oil over med-low heat
- Add 1T Italian seasonings into onion and garlic
- Add ½ t salt & sprinkle of pepper
- Stir in chopped spinach & sauté covered ~5 minutes, cool.
- In bowl, mix rice & spinach together
- Stir in 2 eggs
- Stir in 1 ¼ cup shredded cheese (mozzarella or mild cheddar)
- Stir in ¼ cup shredded parmesan, asiago or romano cheese.
- Roll into small balls with wet hands (or use small ice cream scooper)
- Bake 20 minutes or until browned
- Serve with spaghetti sauce


