Comments Off on Build a Better Butt #6

Build a Better Butt #6

Category : Exercise

Lunges:

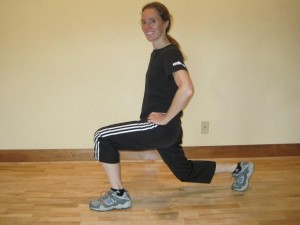
Basic Lunge


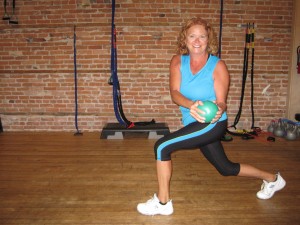
Lunge With Med Ball Twist

Step forward with the right foot, keeping the head up and shoulders aligned over hips; do not allow your torso to angle forward because this will make your quadriceps do more of the work instead of the glutes. Drop your left knee toward the floor by bending both knees, making sure to keep the front heel down and the knee directly over the center of the foot. Push down through your heel to return to the starting position.

You may use a wall or a chair to help you with your balance when you are first learning to do these.

Nick Nilsson,  B.A.Sc., C.P.T., author of Muscle Explosion advises, “When you do a lunge, squeeze the glute hard while you’re pushing up. This will help to activate the glute muscle. It’s all about getting your mind into the muscle and forcing it to contract rather than just going through the motions of an exercise.”

Comments Off on Friday Foodie: Crunchy Chickpeas Snack

Friday Foodie: Crunchy Chickpeas Snack

Category : Healthy Eating

One of our clients suggested that we try this super simple savory snack.  Low in fat and high in fiber these are a nicely satisfying snack that ranks high in the nutrition world.

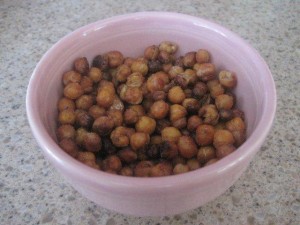
A bowl of crunchy chickpeas

Crunchy Chickpeas

 Each 1/4 cup of crunchy goodness has 120 calories comprised of 2g fat, 6g protein, 20g carbs (including 6g of fiber: that’s a whopping 24% of the recommended daily allowance of fiber).  Omit the salt and use chickpeas made from dry if you are concerned about your sodium intake.

Crunchy Chickpeas (makes 1 3/4 cups):
  • 2 cans (3 1/2 cups cooked) Chickpeas
  • A whimsical mixture of your favorite spices (see suggestions)
  • popcorn salt (for after cooking)
Method: Drain and rinse chickpeas, then pour onto a dish towel and pat dry.  Place into a largish bowl and sprinkle with spice mixture, then stir well.  Pour chickpeas onto a non-stick  jellyroll pan (cookie sheet with low sides) and pop in the oven at 400 degrees for 40 minutes.  Bake until mostly crunchy and allow to cool.  Use popcorn salt to adjust saltiness if needed.  Although not required by most recipes I reviewed, I would suggest refrigerating them if you aren’t going to eat them within a few days.
 
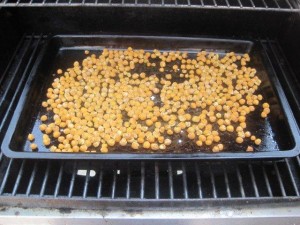
I successfully made these on our grill with both burners on their lowest setting so I wouldn’t heat up the house.  I used  a spatula to stir them every 5-10 minutes as the grill
Chickpeas being roasted on the grill instead of the oven.

A grill is your summer oven!

doesn’t cook quite as evenly as an oven.  (Some “extra crispy” chickpeas happened anyway.)
 
Spice suggestions for your signature super simple savory subtly spicy snack*:
  • 1/2 teaspoon of: cumin & 1/4 teaspoon of cayenne.
  • 1/2 teaspoon of each coriander and paprika (or smoked paprika)
  • 1 teaspoon curry, either hot or sweet
  • 1 teaspoon garam masala
  • 1/2 to 1 teaspoon of any premixed seasoning blend, ie: Nature’s seasoning, Pleasonings, Lawry’s etc…
  • Note: Do not use spice mixtures containing sugar as it will burn. 

*Now say “signature super simple savory subtly spicy snack” five times fast!   Enjoy -XO

Comments Off on Build a Better Butt #5

Build a Better Butt #5

Category : Exercise

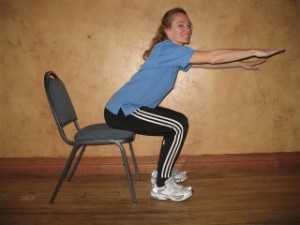
Chair Squat 

chair squat

Almost sit down, but not quite!

This exercise is a great alternative to the traditional squat because you have a chair behind you to give you confidence. Stand with your feet hip distance apart and toes pointed straight ahead. Slowly lower yourself toward the chair, but do not actually sit down. When you are as low as you can go without transferring your weight to the chair stand up and repeat.

Reaching your arms out in front of you as shown will help you counter-balance your butt going back. I always cue my clients to look up “where the wall and ceiling meet” to keep their head up…no diving!

If you don’t feel the glutes working, you are probably leaning too far forward. The forward lean is often caused by a lack of flexibility in the calves. To fix this, stretch the calf muscles, before performing squats. This should also enable you to sit back more and maintain a more upright torso.

Comments Off on Friday Foodie: Simple Basil Pesto

Friday Foodie: Simple Basil Pesto

Category : Healthy Eating

Keep it simple, right?

This pesto is kept simple with fancy additions later. 

All you need is two large bunches of basil, 2-3 cloves of fresh garlic, ½ – ¾ cup olive oil and ½ teaspoon salt. You can add parmesan and pine nuts later if you like.

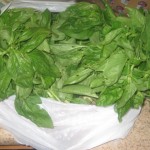
Basil from Farmers Market

Fresh basil is best purchased at the farmer’s market for a fraction of store bought. Karin purchased a plastic shopping nearly full of basil for just $4 (four large bunches).

You only need two bunches for this recipe.

Remove the flowering heads, leaves from the stems and wash the leaves to remove any sand and dirt.

Pat them dry with a towel and coarsely chop them.


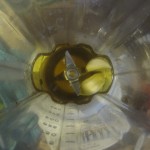
Garlic and oil in blender


Pour ½ cup Olive Oil and 2-3 cloves of garlic into a blender and blend well with the cover on (unless you like oil on your ceiling). Add the coarsely chopped basil in bunches, alternately stopping the blender to push the basil down. Patiently continue to do this, adding more olive oil as needed to allow blending.

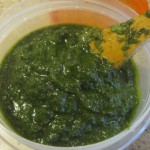
 Once you have a thick, but coarse paste add ½ to ¾ teaspoon salt to taste. That’s it!!! We like to freeze it in small 4 oz. Glad containers. You can add minced pine nuts (walnuts or raw skinless peanuts also work well) and parmesan cheese to taste when you serve it.

What can you do with pesto?

PestoThere are many uses for pesto, and all of them are delicious. Pesto can be frozen into small plastic containers or even ice-cube trays for handy single serving size cubes.

Make a speedy-quick version of a Caprese Salad: Mix several tablespoons of pesto, halved grape or cherry tomatoes and fresh mozzarella cheese. Yum!

Also, it’s great mixed with pasta and fresh tomatoes, on toasted french bread and pizza!

Comments Off on Build a Better Butt #4

Build a Better Butt #4

Category : Exercise

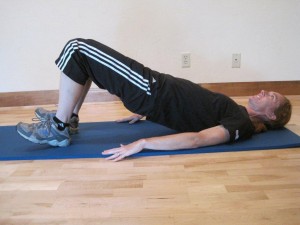
Supine Bridge

Glute Exercise: Supine Bridge

Begin lying on your back with knees bent, heels on the floor, toes slightly lifted off the floor. Brace your abdominals (tighten them as if to guard against someone punching you in the gut); squeeze glutes; then lift hips from the floor to create a straight line from your shoulders to your knees; hold positions for 5-10 seconds and repeat. Many people get cramps in their hamstrings. If this happens to you, STOP. Return to the floor; relax; then focus even more on tightening your glutes BEFORE you lift your hips from the floor.


Comments Off on Friday Foodie: Blueberry Health Muffins

Friday Foodie: Blueberry Health Muffins

Category : Healthy Eating

This time of year you can buy blueberries by the quart instead of by the pint. Sometimes we get overzealous at the Farmers Market and have so many we have to start making everything with blueberries! This week we’ve made blueberry pancakes, blueberry smoothies and blueberry muffins.

I tore this recipe out of a Whole Living magazine a few years back. It has become a favorite at our house and I’ve even brought a batch into the studio on occasion to share with clients.

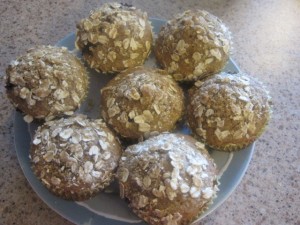
blueberry muffins

Muffin Ingredients

  • 3/4 cup whole-wheat flour
  • 3/4 cup all-purpose flour (we usually don’t have white flour in the house, so I make it with all whole-wheat flour and it turns out fine)
  • 1/2 cup toasted wheat germ
  • 2 tsp. baking powder
  • 1/4 tsp. salt
  • 2/3 cup brown sugar
  • (I also like to add 1/2 tsp. of cinnamon)
  • 3/4 cup milk
  • 1/4 cup canola oil
  • 2 eggs
  • 1 tsp. vanilla
  • 1 1/2 cups blueberries

Muffin topping ingredients

  • 2 Tbsp. wheat germ
  • 1 Tbsp. brown sugar
  • 1/4 cup rolled oats

Instructions

  • Preheat oven to 375 degrees
  • Mix dry ingredients. Add milk, oil, eggs and vanilla; stir until just mixed. Gently fold in blueberries. 
  • Divide evenly among 12 lined muffin cups. We like to use a regular size ice cream scoop for this.
  • Sprinkle tops of muffins with muffin topping.
  • Bake approximately 20 minutes…until a toothpick comes out clean.
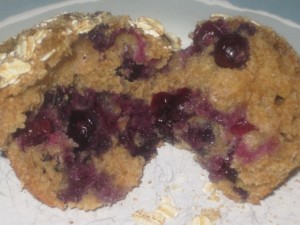
blueberry muffin

Full of juicy berries!

Nutrition Information (per muffin)

196 calories; 1 g saturated fat; 5 g unsaturated fat; 36 mg cholesterol;

30 g carb; 5 g protein; 2 g fiber


If you want to read all about the benefits of blueberries

in your diet check out The World’s Healthiest Foods

Comments Off on Build a Better Butt #3

Build a Better Butt #3

Category : Exercise

Mini-Band Moves

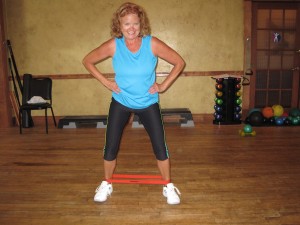
The mini-band is a great piece of fitness equipment (it’s really just an extra large rubber band). It is inexpensive and takes up almost no space, so you can take it with you anywhere. Here are three easy exercises for you to try!

Mini-band sideways shuffle

Mini-band sideways shuffle


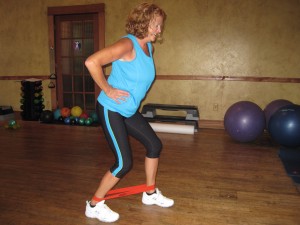
Sideways Shuffle

Stand with band around ankles, knees slightly bent, toes pointed straight ahead and take small side steps keeping constant tension on the band. Start with 10 steps to the right and ten steps to the right.


Mini-band zig-zag walk

Mini-band zig-zag walk

Zig-Zag Steps

Again, start with band around ankles, knees slightly bent and toes straight ahead. Instead of traveling sideways as you did in the last exercise described you should step out and forward with your right foot, and then with your left so that you are moving forward and your feet are making a zig-zag pattern on the floor. Travel forward 10 steps if space allows and then move backward 10 steps.


Mini-band glute squeeze

Mini-band glute squeeze

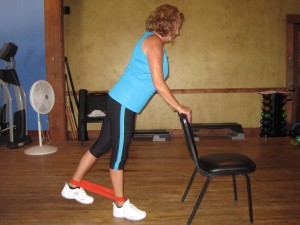
Glute Squeeze

Stand with hand on the back of a chair for support and the band around your ankles. You should be bend slightly forward at the waist with all of you weight on one foot. Lift your other leg straight back pressing against the band ten times; then switch to the other leg. Take care not to arch your back…if you feel any stress in your low back try leaning forward a little more.


 Do you need a mini-band? XO Fitness has them in-stock for just $5

Contact me karin@xofitness.com

Yours in Health & Fitness, Karin

Comments Off on Spot Reduction Doesn’t Work

Spot Reduction Doesn’t Work

Category : Active Living, Exercise

Last week we kicked off our “Moves You Can Use” blog with exercises for specific body parts. That led to the inevitable question, “Can you do a series on ‘How to make my belly flatter’?” That question made us realize that we ought to address the “spot reduction” myth head on!

How do I get rid of this?

People ask us all the time, “What’s the best exercise to get rid of this?” (as they point to an area of their body they feel is a bit too flabby) Infomercials are always promising to “burn fat” off of your belly, your butt, or your thighs. This drives us (and most likely all fitness professionals) crazy because doing specific body part exercises will definitely help to strengthen that muscle but you cannot “spot reduce” fat. 

Burn, baby, burn

Yes, you definitely feel your abdominal muscles when you do crunches or your glutes when you do an exercise to target them. The “burn” you feel is because those muscles are exerting a lot of energy NOT because you are burning fat. So doing abdominal crunches does not mean you are burning abdominal fat.  If your abdominal fat is resistant to mobilization then it will probably be the last fat to be mobilized and utilized. (I know, you didn’t want to hear that)  You will likely notice changes to your arms and other areas and start to wonder why the fat around your stomach (or hips) isn’t cooperating.  Be patient, eventually it will happen! 

So why do spot specific exercises?

As a trainer instruct clients to do specific exercises for core, glutes, arms, etc. The reason is to strengthen those muscles. There are many muscles that become weak when humans spend too much time sedentary and to avoid injury a strong core and glutes are important.

What else can you do?

A combination of aerobic exercise, interval training and muscle-conditioning will get you mobilizing that unwanted body fat. Realize that adopting an active lifestyle with a minimum of 30 minutes of exercise each day and a healthy diet is also crucial to reducing your body fat. The trainers at XO can help you make the changes needed to reach your health & fitness goals. It’s important to pick just one thing that you can do differently this week and make it a habit!


Comments Off on Build a Better Butt #2

Build a Better Butt #2

Category : Exercise

Step Up for a Better Butt

Step Up for a Better Butt

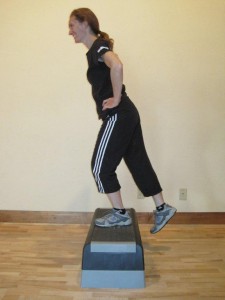
Step-ups: Stand with a sturdy step or box in front of you and place your left foot squarely on the step.  Your entire body should lean slightly forward so that you can transfer your weight to your left foot. Force your left leg (primarily the glutes) to do the work by pushing with the heel and really concentrate on using ONLY your left leg…keep the right leg passive, especially as you initiate the step-up. 

The height of the step can be increased as you become more proficient at performing this exercise, however it should not cause your knee to be bend tighter than a 90 degree angle.

How many?                                                                                                                                    10 slow & controlled reps on each leg. You may increase to 3 sets of 10 reps.

By the way, it’s important for you too know that you can not “burn the fat” off your butt or any other problem area on your body…please read Spot Reduction Doesn’t Work for more information!

Comments Off on Friday Foodie: Grilled Swai & Cauliflower

Friday Foodie: Grilled Swai & Cauliflower

Category : Healthy Eating

It’s time to pull out the grill when it’s over 90’F outside with 100% humidity(and the air Baking on the Grill instead of in the Ovenconditioner seems to be running non-stop just to keep the house below 80!). 

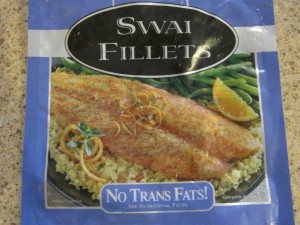
This week our Friday Foodie’s are Karin and her father Paul.  Karin for her cauliflower recipe recently posted here, and Paul for his seasoning recipe that he found for Spicy Grilled Fish.  His recipe calls for Red Snapper or Orange Roughy Fillets, but I found something in the Fish Freezer called Swai.  So I bought it, brought it home, and then looked up online what the heck it was and how to cook it.

According to Wikipedia, Swai is actually an omnivorous freshwater fish found in Thailand’s  Swai FilletsMekong River.  It is really an “Iridescent Shark Catfish” but apparently due to international concerns regarding shark products, it was renamed Swai.  That said, Swai is a mild white fish that has a soft texture and could easily be blackened like Catfish.  I used Paul’s seasoning blend sparingly (although I love it hot!

Paul’s Spicy Fish Seasoning Blend:

2t Paprika
1t salt
1t onion powder
1t garlic powder
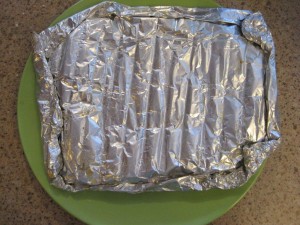
1/4-1/2 t cayenne powderAluminum Foil used for Grilling fish
1/8-1/4 t white pepper
1/4 t each of dried oregano, basil & thyme.
 
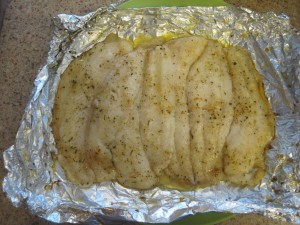
Method:  Defrost and pat excess water off of fish fillets.  Rub the fillets with olive oil and then sprinkle both sides with the seasoning blend.  (Go light for those who don’t like it hot!)  Spray the Grill with cooking spray BEFORE lighting it.  Grill fillets, covered, for 3-4 minutes per side or until fish flakes with a fork.
 

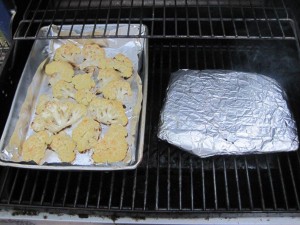
Now, that’s what I was told to do.  What I actually did was make an aluminum foil packet and Swai cooked on grill in foil packetcooked it in that instead.  Because the kids are highly spice sensitive, I actually used very little of the seasoning blend and dotted the fillets with butter.  The result was almost too tender.  I think I’ll blacken the Swai next time I grill it and place it directly on the grill.  -Ryan.